Tuesday 26 March 2019

OAC - Essbase Streaming Dataload from SQL Server Database


Here's a short blog on streaming to the OAC Essbase cloud from a MS SQL Server source. The team at essbaselabs have written a nice blog on streaming Essbase data loads and the Oracle docs are here.

  • Download your MS SQL driver from here
  • Save it to your client machine and add the path to the jar file to your EXTERNAL_CLASSPATH in the esscs.bat file:

  • Using essCLI create the local connection to your on-prem data source:
esscs createLocalConnection -N MSSQL_EPMDB -cs jdbc:sqlserver://epmdb:1433 -u epmsql -D com.microsoft.sqlserver.jdbc.SQLServerDriver


  • Run the dataload command. Here I'm passing the SQL query into the command but you can also store the query in your Essbase rules file:
esscs dataload -application Sample -db Basic -rule SQLData.rul -stream -connection MSSQL_EPMDB -query "Select * from Sales"


Error handling is good and logged in the essbase-cli.log file:


I then correct my SQL statement and the query is successful:


For rules related errors a familiar dataload.err file is created in your working directory:


Correct the rules file and the load is successful:


The other nice feature is that essCLI will compress the data whilst it flies over the interwebs to the Essbase cloud. This means that it reduces any latency which could be associated with loading data from an on-prem source to the cloud.

So there we have it, a very simple way of loading data from your on-prem SQL source to your Essbase cloud target and no messing about with networks and firewalls etc.


Monday 18 March 2019

OAC - Scripted Backups on Autonomous


So, you’ve got Oracle Autonomous Analytics Cloud and you want to schedule a backup of your BI and Essbase applications.

Essbase has the nice esscs/esscli command line REST API wrapper to which will perform an LCM backup for you and you’ve got the MaxL client which you can use to perform data exports. I’ll show an example of this further down this blog

However, at the time of writing this blog there aren’t any documented REST API commands to perform an automated BI BAR extract (these are in the pipeline). This means there isn’t an obvious way to schedule your own non-Oracle backup.

BI Admin Tool and Catalog Manager to the Rescue!

Fortunately, you can use the command line to launch BI Admin Tool and Catalog Manager commands. There’s not much documentation so I’ve blogged how you use these tools to connect to your Oracle Analytics Cloud instance.

OAC RPD Backup

Here we will download and backup our RPD using the datamodel.cmd tool which comes with BI Client. There’s some documentation on the utility here.

There isn’t any info in the link about above on how to use this with OAC Autonomous. However, if you’re a curious bugger like me you may have noticed that the Admin Tool logs seem to record command line versions of your UI actions!

You can find the log here: <BI Client Install> \domains\bi\servers\obis1\logs\Administrator_NQSAdminTool.log

I found this string in the log:
E:\OACS\BI_Client\bi\bitools\bin\\..\..\bitools\bin\datamodel.cmd downloadrpd -O E:\OACS\BI_Client\bi\bifoundation\server\85FA.tmp -W ******* -U <USERNAME> -P ******* -Q E:\OACS\BI_Client\bi\bifoundation\server\85FB.tmp -SI bootstrap -S <tenant_name>.analytics.ocp.oraclecloud.com -N 443 -SSL -TS E:\OACS\BI_Client\oracle_common\jdk\jre\lib\Security\cacerts -TSP ******* -Y

Cool! This is what the command looks like in the command line when connecting to Autonomous Analytics:


<BI Client Install>\bi\bitools\bin\datamodel.cmd downloadrpd -O liverpd.rpd -W RPD_PWD -U <USERNAME> -P <PASSWORD> -SI bootstrap -S <BI_HOST> -N 443 -SSL -TS E:\OACS\BI_Client\oracle_common\jdk\jre\lib\Security\cacerts -TSP <TRUST STORE PASSWORD> -Y

The BI_HOST will be something like myinstance-tenantname.analytics.ocp.oraclecloud.com
The OAC RPD file is called liverpd.rpd.

This will download liverpd.rpd into your current working directory. You can then use your scripting tool of choice to rename/timestamp etc. Nice and simple!

OAC Catalog Backup

Luckily since OAC Developer Client 19.1.1 the BI Catalog Manager is supported in OAC. You can also use the Catalog Manager in the command line. This will enable us to download an archive file of any folders/objects available to us in BI. I had some issues getting the syntax correct so again I hope this will help some people with their scripts.

There is some info on the command line here . There are a few blog posts out there but nothing specific to OAC.

To run catalog manager from the command line you run the runcat.cmd/sh command:

<BI Client Install>\bi\bitools\bin\runcat.cmd

To view the help run:
runcat.cmd -help


To view help on a specific command run:
runcat.cmd -cmd <command> -help

To archive your catalog run the archive command:


runcat.sh -cmd archive -online https://myinstance-tenant.analytics.ocp.oraclecloud.com/analytics-ws/saw.dll? -credentials credentials.txt -folder /shared -forceOutputFile E:\OACS\Backup\Shared_Archive


The credentials.txt file is where you store your OACS username and password in the following format:
login=guillaume.slee
pwd=myPassword

It would be nice if you could encrypt this but I don’t think you can.

The example above will archive my entire BI /shared folder and download it to my client machine in a file called E:\OACS\Backup\Shared_Archive.


Essbase LCM Backup

Thankfully the Essbase backup is a very simple process. Use the Essbase Client tool to perform an LCM backup of the Essbase application and download to your client machine. The documentation can be found here .

Example:
esscs lcmExport -v -a Sample -z Sample.zip -ld E:\Essbase\Backup

The command will create a zip file containing LCM extracts of all the Essbase databases associated with the application.
Essbase will perform an All Data export of each database across 10 threads.

If your database is large you have the option to use the -skipdata flag to exclude data in the LCM backup. You could then use the MaxL client to perform a smaller level zero export.

Friday 8 March 2019

OAC - Bulk Importing Users & Groups via IDCS REST API

In my previous post (here) we saw how it's possible to bulk import users using a CSV file. Here we look at how we can automate creating/importing users using the IDCS REST API.

Note: there is a tool called the Identity Bridge Agent which you can install to sync your MSAD users with IDCS with no coding required. However, you will need to subscribe to a paid version of IDCS to use the Identity Bridge Agent. There are 3 versions of IDCS:

  • Foundation: Free with your OACS subscription
  • Basic: Not included with OACS. You need to subscribe to this if you want to use the Bridge Agent. It also includes additional authentication features above Foundation
  • Standard: Same as Basic with even more features
  • Go here for information on IDCS versions
  • Go here for information on the IDCS Bridge Agent and here for a lovely tutorial on how you install it


Okay, back to the IDCS REST API. Here are the links to the Oracle documentation I used. Kudos again to the documentation team!
Make your first REST API call
Managing Users Using REST API Calls

IDCS REST API Pre-Requisites

There are a couple of things we need to do before we make our first REST API calls:


  • Choose a REST API client. I'm using Windows and PowerShell has the ability to make REST API calls. However, I've decided to use CURL as all the Oracle examples use this. You can download it from here. Just unzip the package to use it, there is no install required:


  • Register a Client Application in IDCS to enable connectivity from the REST client.

Registering the REST API Client Application in IDCS

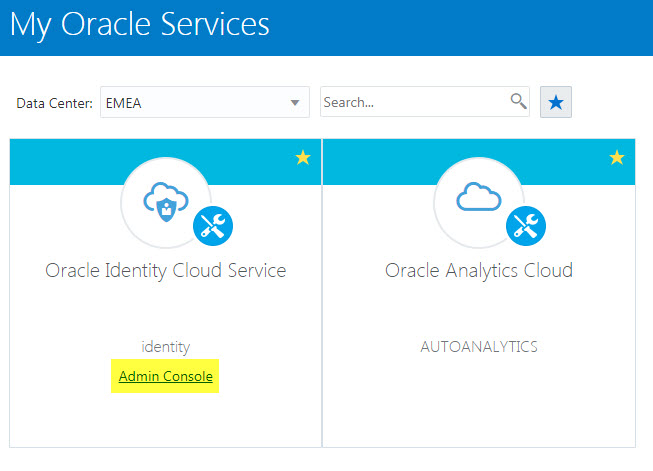
You need to enable connectivity from a client app in the IDCS admin console. By doing this you will get the Client ID and Client Secret which are the equivalent of the user name and password that the REST API will use to login to IDCS.
  • In the IDCS Admin Console go to Application->Add:

  • Select Confidential Application
  • Enter a name for the app. You can have different apps for different purposes. Each app will have it's own unique CLIENT_ID and CLIENT_SECRET combination. Using this logic you could for instance create 3 apps; App1 for managing all the REST API user management, App2 for managing Essbase REST API calls and App3 for managing BI REST API calls. By disabling one of the apps you could  disable all calls from one specific application team if you wished.
  • Click Next
  • Select 'Client Credentials' and 'JWT Assertion' in the Allowed Grant Types:
The grant types define how the IDCS handles authorisation:
Client Credentials - This will generate our Client ID and Client Secret
JWT Assertion - this enables the REST client to connect using a JSON web token (JWT)

  • On the Client page, scroll down to the Grant the client access to Identity Cloud Service Admin APIs. section, and click Add

  • In the Add App Role dialog box, select the type of access your REST API account needs. We are doing high-level security tasks so we will select Identity Domain Administrator, and then click Add:
  • Now keep clicking next and Finish

After you click Finish you will see a pop-up box containing your Client ID (think username) and Client Secret (think password). Note this down safely to use when you start making REST API calls.

  • Finally click Activate to enable the application:


Running Your First IDCS REST API Call

To keep things nice and simple for my old brain I'm going to use the Windows command tool to launch our REST calls.

The first call we need to make is effectively the login. The login will create an access token for us and we will use this access token in subsequent commands.


Login to IDCS Using REST

curl -k -X POST -u "CLIENT_ID:CLIENT_SECRET" -d "grant_type=client_credentials&scope=urn:opc:idm:__myscopes__" "IDCS_URL/oauth2/v1/token" -o access_token.json

I've highlighted in bold the parts of the command we need to modify namely:

  • CLIENT_ID: This is what we generated when we created our IDCS client app earlier.
  • CLIENT_SECRET: Same as above.
  • IDCS_URL: This is the URL to our IDCS instance. You can get this by copying it from the URL of your IDCS console. The URL will look something like this:
https://idcs-<WHOLE_BUNCH_OF_RANDOM_CHARACTERS>.identity.oraclecloud.com
  • access_token.json: This is the file which will contain the output of the REST API call. It will contain the token we need to run subsequent calls to IDCS. It looks something like this:

{
"access_token":"<ENORMOUS_STRING_OF_RANDOM_CHARACTERS>",
"token_type":"Bearer",
"expires_in":3600
}

Here is what it looks like in the windows command window:


If your REST call is unsuccessful for whatever reason you will see an HTML error message in your access_token.json file:


Creating an IDCS User Using REST (equivalent to manual user creation)

This was the first example I found for adding a user and it worked but it did not end up being my preferred solution. The preferred solution was to use the bulk user CSV upload (scroll further down this blog) as this was more user friendly but I'm adding the non-bulk method here for completeness.

The CURL command to create a user in IDCS is as follows:

curl -k -v -X POST -H "Content-Type: application/scim+json" -H "Authorization: Bearer ACCESS_TOKEN" "IDCS_URL/admin/v1/Users" -d "@FILE_NAME" -o user_output.json

Note the double quotes around the FILE_NAME. The Oracle documentation uses single quotes but this causes an error, double quotes are required when using Windows.

The FILE_NAME is a file containing the user information in JSON format or the JSON payload:

{
  "schemas": ["urn:ietf:params:scim:schemas:core:2.0:User"],
  "userName": "john.smith@brewery.com",
  "name": {
    "familyName": "Smith",
    "givenName": "John",
  },
  "emails": [{
    "value": "john.smith@brewery.com",
    "type": "work",
    "primary": true
  }]
}

Example:

curl -k -v -X POST -H "Content-Type: application/scim+json" -H "Authorization: Bearer ENORMOUS_STRING_OF_CHARACTERS" "https://idcs-db123456789.identity.oraclecloud.com/admin/v1/Users" -d "@users.json" -o user_output.json


You can add as many users in the payload as you wish. The user_output.json file will contain any errors that may have occurred during your import. You would need to add a mechanism to catch any errors and alert the end users. One drawback of this solution is these loads to not appear as a job in the IDCS admin console  and whilst there are many ways to create JSON formatted files the format is not nice for end users.


IDCS Bulk CSV User Import Using the REST API

This was my preferred solution for this particular customer. They already had an on-prem SQL database regularly updated from MS Active Directory with new users so we could use this as our source to create our Users.CSV file. This method also uses a IDCS job to import the users so all success/failure logging appears in the IDCS console. It makes it a more integrated solution and more user friendly for the administrators.

The steps we need to go through for the CSV import are documented here

  1. Login to IDCS
  2. Upload the CSV file to the IDCS storage area
  3. Schedule a IDCS user import job (to run immediately)
  4. Check the status of the job

We've seen the command to login and get our access token earlier in this blog.

Upload a File to IDCS Using REST

This is the CURL command to upload our CSV file:

curl -X POST -H "Content-Type: multipart/form-data" -H "Authorization: Bearer ACCESS_TOKEN" -H "Cache-Control: no-cache" -F "fileName=FILE_NAME" -F "contentType=text/csv" -F "isPublic=false" -F file=@"FILE" "IDCS_URL/storage/v1/Files" -o file_output.json


  • FILE_NAME: This is the name you give to the file when it is uploaded to the IDCS storage
  • FILE: This is the local file name for your Users.CSV file
  • file_output.json: This will contain the output of the command in JSON format. This output will contain the IDCS storage location of our uploaded file. We will need this to schedule the IDCS job

Example:

curl -X POST -H "Content-Type: multipart/form-data" -H "Authorization: Bearer ENORMOUS_STRING_OF_CHARACTERS" -H "Cache-Control: no-cache" -F "fileName=users.csv" -F "contentType=text/csv" -F "isPublic=false" -F file=@"users.csv" "https://idcs-db123456789.identity.oraclecloud.com/storage/v1/Files" -o file_output.json


This is what the file_output.json looks like:

{"fileName":"files/12345678987654321/users.csv",
"isPublic":false,
"fileUrl":"https://em3.storage.oraclecloud.com/v1/RANDOM_CHARACTERS/users.csv"}

The fileUrl in bold above is what we need to be able to run the IDCS User import job.


Schedule an IDCS User Import Job using REST

The CURL command to schedule an IDCS job is:

curl -X POST -H "Content-Type: application/scim+json" -H "Authorization: Bearer ACCESS_TOKEN" -H
"Cache-Control: no-cache" -d '{
   "schemas": [
     "urn:ietf:params:scim:schemas:oracle:idcs:JobSchedule"
   ],
  "jobType": "UserImport",
   "runNow": true,
   "parameters": [
    {
      "name": "fileLocation",
      "value": "files/201608261841/UsersImp1.csv"
     },
    {
       "name": "fileType",
       "value": "csv"
     }
   ]
 }' "https://IDCS_URL/job/v1/JobSchedules"

The JSON payload in the command defines our scheduled job and is self explanatory. The job type is to UserImport, we want it to run immediately, the fileLocation is the fileName we captured in our previous upload command, the fileType is CSV.

In order to get the windows command line to read the payload on one line we need to do some escaping of the characters. This is what the command actually looks like in the command prompt (apologies, it looks awful!):

curl -X POST -H "Content-Type: application/scim+json" -H "Authorization: Bearer ENORMOUS_STRING_OF_CHARACTERS" -H "Cache-Control: no-cache" -d "{\"schemas\": [\"urn:ietf:params:scim:schemas:oracle:idcs:JobSchedule\"], \"jobType\": \"UserImport\", \"runNow\": true, \"parameters\": [{ \"name\": \"fileLocation\", \"value\": \"files/12345678987654321/users.csv\"}, {\"name\": \"fileType\", \"value\": \"csv\"}]}" https://idcs-db123456789.identity.oraclecloud.com/job/v1/JobSchedules -o schedule_output.json

If the command is successful you will see the job in the IDCS job console:


The output to the JobSchedules command gives you the Job ID which you can use to check the job status. Here is the output of the schedule_output.json:

{"id":"95b78969-58f2-4efg-p0ac-16ae6702f8e0",
"isDisabled":false,
"jobType":"UserImport",
"nextFireTime":"2019-02-28T15:20:15.280Z",
"runAt":"2019-02-28T15:20:15.280Z",
"parameters":[
{"name":"fileLocation",
"value":"files/12345678987654321/users.csv"},
{"name":"fileType","value":"csv"}],
"schemas":["urn:ietf:params:scim:schemas:oracle:idcs:JobSchedule"],
"meta":{"resourceType":"JobSchedule",
"location":"https://IDCS_URL/job/v1/JobSchedules"}
}


The Oracle documentation is very good but there are some parts where the quotes aren't quite correct or the syntax differs slightly in Windows. Hopefully this blog might help others out there looking for a quick start to dip their toes into IDCS and the REST API.

OAC - Bulk Importing Users & Groups via the IDCS UI

A key part of Cloud SaaS is integrating with your existing systems. This blog will show you how to bulk import users manually via the IDCS UI. The second part of the blog (here) will show you how to do this in an automated way using CURL and the IDCS REST API.

IDCS User Federation

All user/group security and roles for the Oracle Analytics Cloud are managed within the Oracle Identity Cloud Service. IDCS allows you to add users natively or use federation to authenticate your users with an external identity provider. In my case we used Microsoft Active Directory Federation Server (ADFS) as our authentication provider.

The setup is relatively simple and it worked first time! It also gave us true Single Sign-On SSO (the users just open their browser to access BI without having to login, user security is still maintained). This tutorial from Oracle is very good and all we needed to configure the security integration: Oracle Identity Cloud Service: Integrating with Microsoft Active Directory Federation Services (AD FS).

With the IDCS - ADFS integration your users can login to OAC with their Windows username and password. However, you still need to create the user account in IDCS in order for the account to be mapped or federated with your ADFS account. This can be done manually in the IDCS User console and it's fine if you have a limited number of users but you would not want to create 100s of users manually.

Creating a User Manually

The manual user creation process is simple:
  • Open the IDCS Admin Console:


  • Select users:

  • Click Add:

  • Enter the user details:


Note the 'Federated' button. Make sure this is enabled if you want your user to authenticate against your external provider:


Your user should now be able to login using their Windows password authenticated by your ADFS identity provider.

IDCS Bulk User Import using a CSV File

As I mentioned earlier, you wouldn't want to create 100s of users manually. Thankfully there's a really easy to use bulk import feature available in IDCS for both users and groups and the documentation supplied by Oracle is very good. Brilliant documentation is an unexpected benefit of Oracle's move to the cloud! Here is the link:

https://docs.oracle.com/en/cloud/paas/identity-cloud/uaids/import-user-accounts.html

Download the CSV template from the link above. Note the 'Federated' and 'Active' columns, I've set these both to true so that the user is authenticated against my ADFS identity provider and can login immediately.

  • Enter your user details into the CSV file. In this example I'm entering the minimum amount of details:

  • Login to the IDCS Admin Console
  • Click on Users
  • Click on Import:

  • Browse for your CSV file and import:

  • You should see a notification that the import job was started. Check the IDCS Job Console to see whether the import was successful:

  • Job Console details:


  • Click on View Details to see more detailed information on the job:

The screenshot above is from a different import (we would see 3 users listed if we used my example CSV file above). We can see the list of users that were imported successfully and the status. It's a very simple and intuitive tool to use.

IDCS Bulk Group Import Using a CSV File

The process of creating new groups and assigning users to those groups is also very easy.

  • Download the Groups CSV template from the same link further up the blog.
  • Enter the user/group mappings:

Here all the users will be added to my OBI_Viewer group but only Timothy will be added to the ESB_Read group.
  • Click on Groups
  • Click on Import
  • Check the IDCS Job Console to see whether the import was successful:


Ok, so far so good. But what if we wanted to automate this process? Well that's where the REST API comes into play. The documentation is again very good and we shall cover this in the next post.

Friday 1 March 2019

OAC - How to Create Oracle Autonomous Essbase and OBI Analytics Cloud Instances?

I've recently been implementing Autonomous Oracle Analytics Cloud for a customer. The customer had Essbase and OBIEE on-prem and we have migrated everything to the Oracle Autonomous Cloud.

It's been an interesting process and whilst there have been some small niggles the OAC offering is a very simple to use and powerful platform.

In this OAC blog (the first of several if I get the time!) I will show how easy it is to spin up new OAC instances. We shall create an Essbase instance and a Business Intelligence Enterprise instance, each running on one OCPU.

With the Autonomous Cloud, Oracle have made this process super simple!

There are free trials available, so I urge you all to give it a go and test drive the new features in Essbase 12c and Data Visualization. When you receive your login, you will get a URL which will direct you to your Oracle Services:

https://myservices-<TENENT-NAME>.console.oraclecloud.com/mycloud/cloudportal/cloudHome 

This will give you a huge list of all the services your Oracle credits enable you to use. You can filter these down to a more manageable list by 'favouriting' your relevant services (clicking on the star). I'm interested in the Oracle Analytics Cloud and the Oracle Identity Cloud Server (more on IDCS in a subsequent blog). Here is my shortened list of services:

Both Essbase and OBIEE come under the Analytics service so click on the Oracle Analytics Cloud link highlighted in yellow. 

Creating the OAC Autonomous Business Intelligence Enterprise Edition Instance


You don't need to know anything about infrastructure or installs with Autonomous. Just click on the ‘Create Instance’ link to build your Essbase/OBIEE instance. 


You have a choice of options for your instance: 
  • Instance Name: The name of your Analytics instance. This will appear in the OBI/Essbase URL. You are not allowed to use any special characters in the instance name. 
  • Description. Enter the description of the service here.
  • Notification Email. All information associated with the instance (patch notifications, failures) will be sent to this account. 
  • Region. Choose your closest data centre. 
  • License Type. Choose between the Bring Your Own License (BYOL) model or the standard subscription model. 
  • Edition. Choose between Oracle Analytics Cloud - Standard, Oracle Analytics Cloud - Essbase, Oracle Analytics Cloud - Enterprise. 
  • Feature Set. This is the subset of features contained within the 'Edition'. 
  • Number of OCPUs. Self-explanatory! 


Here is the list of OAC Editions:


And here is the list of feature sets:


Click create and after about 10 minutes your OBI instance is created. 


To access your OBI instance click on the burger menu on the right hand side and select 'Oracle Analytics Cloud URL'. 


This will take you to the OAC Data Visualization homepage: 


Creating the OAC Autonomous Essbase Cloud Instance

Now to create the Oracle Autonomous Analytics Cloud Essbase instance.

We follow the same process as the BI instance but change the instance details. The only thing we have changed here is our Instance name and the Feature Set: Essbase - Collaborative Data Collection, Scenarios and What-if Analysis.


Here we had an issue with the creation process. We logged an SR with Oracle and they un-froze the creation process. I'm sure Oracle will iron out these small niggles in the future. 

Once you have created your Essbase instance it too will appear in your Analytics instances list: 


Click on the link on the burger menu to login to the new Essbase Jet UI:


I did say it was super simple!
  • We haven't had to wait months to allocate hardware
  • We haven't had to download GBs of software installers
  • We haven't had to wait days for an infrastructure consultant to install the stack

However, there are some fundamental aspects of the service which need improving:
  • You cannot currently stop a service on demand (there is no STOP button in the console menu!). To stop the service or to schedule up-time you need to log an Oracle Service Request
  • You can't modify the existing instance (number of OCPU for example). Again, you need to log an SR to get it modified
Oracle are working to get these and many more features added. With the crazy pace that things change in the Oracle Cloud I'm sure it won't be long before they are there.

That's it for now, more OACS content coming soon.