Note: there is a tool called the Identity Bridge Agent which you can install to sync your MSAD users with IDCS with no coding required. However, you will need to subscribe to a paid version of IDCS to use the Identity Bridge Agent. There are 3 versions of IDCS:
- Foundation: Free with your OACS subscription
- Basic: Not included with OACS. You need to subscribe to this if you want to use the Bridge Agent. It also includes additional authentication features above Foundation
- Standard: Same as Basic with even more features
- Go here for information on IDCS versions
- Go here for information on the IDCS Bridge Agent and here for a lovely tutorial on how you install it
Okay, back to the IDCS REST API. Here are the links to the Oracle documentation I used. Kudos again to the documentation team!
Make your first REST API call
Managing Users Using REST API Calls
IDCS REST API Pre-Requisites
There are a couple of things we need to do before we make our first REST API calls:- Choose a REST API client. I'm using Windows and PowerShell has the ability to make REST API calls. However, I've decided to use CURL as all the Oracle examples use this. You can download it from here. Just unzip the package to use it, there is no install required:

- Register a Client Application in IDCS to enable connectivity from the REST client.
Registering the REST API Client Application in IDCS
You need to enable connectivity from a client app in the IDCS admin console. By doing this you will get the Client ID and Client Secret which are the equivalent of the user name and password that the REST API will use to login to IDCS.
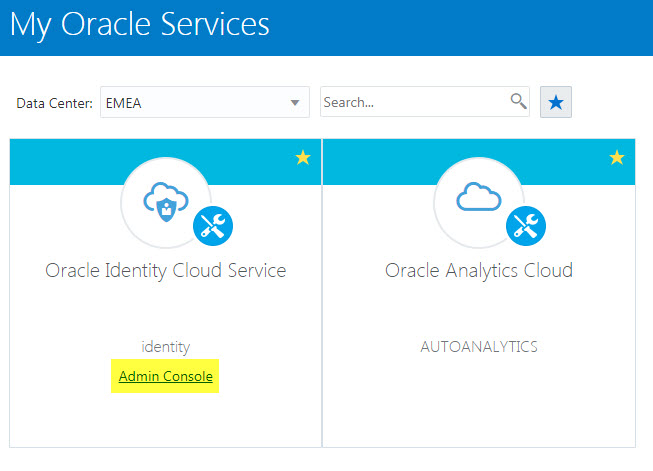
- In the IDCS Admin Console go to Application->Add:

- Select Confidential Application
- Enter a name for the app. You can have different apps for different purposes. Each app will have it's own unique CLIENT_ID and CLIENT_SECRET combination. Using this logic you could for instance create 3 apps; App1 for managing all the REST API user management, App2 for managing Essbase REST API calls and App3 for managing BI REST API calls. By disabling one of the apps you could disable all calls from one specific application team if you wished.

- Click Next
- Select 'Client Credentials' and 'JWT Assertion' in the Allowed Grant Types:

The grant types define how the IDCS handles authorisation:
Client Credentials - This will generate our Client ID and Client Secret
JWT Assertion - this enables the REST client to connect using a JSON web token (JWT)
- On the Client page, scroll down to the Grant the client access to Identity Cloud Service Admin APIs. section, and click Add

- In the Add App Role dialog box, select the type of access your REST API account needs. We are doing high-level security tasks so we will select Identity Domain Administrator, and then click Add:

- Now keep clicking next and Finish

After you click Finish you will see a pop-up box containing your Client ID (think username) and Client Secret (think password). Note this down safely to use when you start making REST API calls.
- Finally click Activate to enable the application:

Running Your First IDCS REST API Call
To keep things nice and simple for my old brain I'm going to use the Windows command tool to launch our REST calls.The first call we need to make is effectively the login. The login will create an access token for us and we will use this access token in subsequent commands.
Login to IDCS Using REST
curl -k -X POST -u "CLIENT_ID:CLIENT_SECRET" -d "grant_type=client_credentials&scope=urn:opc:idm:__myscopes__" "IDCS_URL/oauth2/v1/token" -o access_token.json
I've highlighted in bold the parts of the command we need to modify namely:
- CLIENT_ID: This is what we generated when we created our IDCS client app earlier.
- CLIENT_SECRET: Same as above.
- IDCS_URL: This is the URL to our IDCS instance. You can get this by copying it from the URL of your IDCS console. The URL will look something like this:
- access_token.json: This is the file which will contain the output of the REST API call. It will contain the token we need to run subsequent calls to IDCS. It looks something like this:
{
"access_token":"<ENORMOUS_STRING_OF_RANDOM_CHARACTERS>",
"token_type":"Bearer",
"expires_in":3600
}
Here is what it looks like in the windows command window:

If your REST call is unsuccessful for whatever reason you will see an HTML error message in your access_token.json file:

Creating an IDCS User Using REST (equivalent to manual user creation)
This was the first example I found for adding a user and it worked but it did not end up being my preferred solution. The preferred solution was to use the bulk user CSV upload (scroll further down this blog) as this was more user friendly but I'm adding the non-bulk method here for completeness.The CURL command to create a user in IDCS is as follows:
curl -k -v -X POST -H "Content-Type: application/scim+json" -H "Authorization: Bearer ACCESS_TOKEN" "IDCS_URL/admin/v1/Users" -d "@FILE_NAME" -o user_output.json
Note the double quotes around the FILE_NAME. The Oracle documentation uses single quotes but this causes an error, double quotes are required when using Windows.
The FILE_NAME is a file containing the user information in JSON format or the JSON payload:
{
"schemas": ["urn:ietf:params:scim:schemas:core:2.0:User"],
"userName": "john.smith@brewery.com",
"name": {
"familyName": "Smith",
"givenName": "John",
},
"emails": [{
"value": "john.smith@brewery.com",
"type": "work",
"primary": true
}]
}
Example:
curl -k -v -X POST -H "Content-Type: application/scim+json" -H "Authorization: Bearer ENORMOUS_STRING_OF_CHARACTERS" "https://idcs-db123456789.identity.oraclecloud.com/admin/v1/Users" -d "@users.json" -o user_output.json

IDCS Bulk CSV User Import Using the REST API
This was my preferred solution for this particular customer. They already had an on-prem SQL database regularly updated from MS Active Directory with new users so we could use this as our source to create our Users.CSV file. This method also uses a IDCS job to import the users so all success/failure logging appears in the IDCS console. It makes it a more integrated solution and more user friendly for the administrators.The steps we need to go through for the CSV import are documented here
- Login to IDCS
- Upload the CSV file to the IDCS storage area
- Schedule a IDCS user import job (to run immediately)
- Check the status of the job
We've seen the command to login and get our access token earlier in this blog.
Upload a File to IDCS Using REST
This is the CURL command to upload our CSV file:curl -X POST -H "Content-Type: multipart/form-data" -H "Authorization: Bearer ACCESS_TOKEN" -H "Cache-Control: no-cache" -F "fileName=FILE_NAME" -F "contentType=text/csv" -F "isPublic=false" -F file=@"FILE" "IDCS_URL/storage/v1/Files" -o file_output.json
- FILE_NAME: This is the name you give to the file when it is uploaded to the IDCS storage
- FILE: This is the local file name for your Users.CSV file
- file_output.json: This will contain the output of the command in JSON format. This output will contain the IDCS storage location of our uploaded file. We will need this to schedule the IDCS job
Example:
curl -X POST -H "Content-Type: multipart/form-data" -H "Authorization: Bearer ENORMOUS_STRING_OF_CHARACTERS" -H "Cache-Control: no-cache" -F "fileName=users.csv" -F "contentType=text/csv" -F "isPublic=false" -F file=@"users.csv" "https://idcs-db123456789.identity.oraclecloud.com/storage/v1/Files" -o file_output.json
This is what the file_output.json looks like:
{"fileName":"files/12345678987654321/users.csv",
"isPublic":false,
"fileUrl":"https://em3.storage.oraclecloud.com/v1/RANDOM_CHARACTERS/users.csv"}
Schedule an IDCS User Import Job using REST
The CURL command to schedule an IDCS job is:curl -X POST -H "Content-Type: application/scim+json" -H "Authorization: Bearer ACCESS_TOKEN" -H
"Cache-Control: no-cache" -d '{
"schemas": [
"urn:ietf:params:scim:schemas:oracle:idcs:JobSchedule"
],
"jobType": "UserImport",
"runNow": true,
"parameters": [
{
"name": "fileLocation",
"value": "files/201608261841/UsersImp1.csv"
},
{
"name": "fileType",
"value": "csv"
}
]
}' "https://IDCS_URL/job/v1/JobSchedules"
The JSON payload in the command defines our scheduled job and is self explanatory. The job type is to UserImport, we want it to run immediately, the fileLocation is the fileName we captured in our previous upload command, the fileType is CSV.
In order to get the windows command line to read the payload on one line we need to do some escaping of the characters. This is what the command actually looks like in the command prompt (apologies, it looks awful!):
curl -X POST -H "Content-Type: application/scim+json" -H "Authorization: Bearer ENORMOUS_STRING_OF_CHARACTERS" -H "Cache-Control: no-cache" -d "{\"schemas\": [\"urn:ietf:params:scim:schemas:oracle:idcs:JobSchedule\"], \"jobType\": \"UserImport\", \"runNow\": true, \"parameters\": [{ \"name\": \"fileLocation\", \"value\": \"files/12345678987654321/users.csv\"}, {\"name\": \"fileType\", \"value\": \"csv\"}]}" https://idcs-db123456789.identity.oraclecloud.com/job/v1/JobSchedules -o schedule_output.json

The output to the JobSchedules command gives you the Job ID which you can use to check the job status. Here is the output of the schedule_output.json:
{"id":"95b78969-58f2-4efg-p0ac-16ae6702f8e0",
"isDisabled":false,
"jobType":"UserImport",
"nextFireTime":"2019-02-28T15:20:15.280Z",
"runAt":"2019-02-28T15:20:15.280Z",
"parameters":[
{"name":"fileLocation",
"value":"files/12345678987654321/users.csv"},
{"name":"fileType","value":"csv"}],
"schemas":["urn:ietf:params:scim:schemas:oracle:idcs:JobSchedule"],
"meta":{"resourceType":"JobSchedule",
"location":"https://IDCS_URL/job/v1/JobSchedules"}
}
The Oracle documentation is very good but there are some parts where the quotes aren't quite correct or the syntax differs slightly in Windows. Hopefully this blog might help others out there looking for a quick start to dip their toes into IDCS and the REST API.